AtvsParts

Rebuilding a CVT Clutch: The Basics

Most of today’s ATVs use a constantly variable transmission (CVT) clutch system.  While they vary by manufacturer, the basics of a CVT clutch are essentially the same.

The two sheaves of the primary clutch are spread apart from one another because there’s a clutch spring within the assembly pushing them apart. The primary clutch assembly is directly attached to the crankshaft, so as the engine runs, the rotation of the crankshaft causes the assembly to rotate with it. As the engine speed increases, the RPMs increase and the speed to which the primary clutch rotates also increases.

As it rotates faster, the primary clutch generates centrifugal force on those weights, and they begin to overcome the force of the clutch spring. When the force of the spring is overcome, the outer sheaves move inward toward the inner sheave. This movement pinches down on the belt, engaging it, and transferring the rotational power from the primary clutch to the secondary clutch.

As mentioned, each manufacturer’s version of the CVT clutch is different, but they all basically work the same way. If the sheaves won’t move and push and pull the belt in or out, it might be time to rebuild the clutch. Watch the video above and follow the steps below for the basics of how to rebuild a CVT clutch.

Tools Needed – CVT Clutch Rebuild

  • Ratchet and sockets
  • Torque wrench
  • Primary clutch drive puller (specialty)
  • Clutch drive compression tool (specialty)

NOTE: We used a 2011 Polaris Sportsman 850 XP CVT clutch for reference, but the CVT clutch system on other ATVs will be very similar. The main differences are the specs, so refer to the service manuals for your ATV. You might also need different specialty tools if you’re dealing with a different ATV make and model. 

The Basics of Rebuilding a CVT Clutch

Step 1. Remove the wheel and the clutch cover.

NOTE: On a Polaris Sportsman 850, you need to remove a frame strut first to get to the clutch cover. 

Step 2. Remove the drive belt.

NOTE: Watch the video above to see the process of removing and replacing the drive belt on a Polaris Sportsman ATV. 

Step 3. Remove the secondary clutch assembly.

Step 4. Remove the primary clutch assembly by first taking off the primary clutch bolt, then using the primary clutch drive puller to break the primary clutch assembly free from the housing.

NOTE: The bolt holding the primary clutch on this particular model has a reverse thread, so you need to turn it clockwise to loosen it.

Step 5. Inspect the drive belt by running your fingers along each side of the belt, feeling for any uneven patches or wear. Check the belt’s teeth for any that may be cracked or damaged, and examine the overall condition of the drive belt. A healthy belt feels flexible; an older belt feels dry and stiff.

Step 6. Inspect the sheaves by running your fingers across the faces of each sheave to make sure they’re perfectly smooth, with no grooves or channels dug into them. Each sheave should be a bright metallic color, so if a sheave is darkened or discolored, it’s glazed and may need to be replaced.

PRO TIP: Before replacing a glazed sheave, try using contact cleaner and an abrasive cleaning pad to knock off the glaze. This gives the belt a clean, lightly scuffed surface to bite into. 

Step 7. Take the primary clutch apart by using the clutch compression tool to keep pressure on the clutch spring so that you can remove the outer plate.

PRO TIP: Before taking the primary clutch apart, mark where the outer plate is in relation to the inner plate. They’re balanced, so marking them helps ensure they’ll be reinstalled in the same orientation.

Step 8. Replace the weights if necessary. If you have to replace the weights, make sure to purchase identical weights to those already installed on the clutch. This is because most manufacturers design their CVT clutches to fit multiple models, and each of those vehicles has a slightly different clutch setup, so the clutch will require vehicle-specific weights and spring.

PRO TIP: If you have to replace the weights or transfer them from an old clutch assembly to a new one, install new shoulder bolts and flex lock nuts on each of them. They’re inexpensive, and fitting new ones gives you peace of mind that they’re working perfectly once you put everything back together again. 

Step 9. Reinstall the CVT clutch by simply reversing what you did to take it apart.

ABOUT CVT Clutch
“atv cvt clutch cleaning”
“atv cvt clutch tuning”
“atv cvt clutch”
“atv cvt clutch kit”
“how to drive a clutch atv”

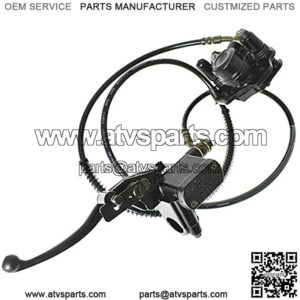
Alternative method to Bleed the ATV Master Cylinder

Alternative method to Bleed the ATV Master Cylinder

A variation of the above methods is when you, instead of controlling the fluid stream with your finger, use the banjo bolt as a bleed valve.

This is how you do it:

1. Open the brake fluid reservoir lid and diaphragm. Be careful; the bolts strip easily.

2. Pour new brake fluid into the reservoir so that it’s at the maximum level mark.

3. Place plenty of rags to soak up the brake fluid being bled.

4. Pull back the rubber cap covering the banjo bolt.

5. Then pump the brake lever as you do when manually bleed the brakes.
6. But instead of opening the bleed valve by the caliper, you open the banjo bolt until the brake fluid starts sputtering out.

7. Tighten the bolt when the brake lever is about 80% engaged.
8. Re-apply pressure and open the banjo bolt again.
9. Continue until you get a sputter-free stream of brake fluid.
10. Then bleed the brakes normally. You should now be able to build proper pressure.

This method may be a bit messier, so make sure you use plenty of rags to keep your ATV protected.

Yet another alternative method – directing fluid back into the reservoir

You’re probably starting to realize there is almost no limit to how many ways you can bleed the brakes on an ATV. Here is another tip to try.

Instead of letting the brake fluid squirt out of the banjo bolt and down onto a rag, you can direct it back up into the reservoir. Insert a piece of clear tubing into the outlet port on the reservoir and put the other end of the tube down into the master cylinder.

Make sure it is completely submerged at all times. Then start pumping.

Continue until you see only clear brake fluid inside the clear tube. When you are done, install the banjo bolt quickly, so as little air as possible gets into the system. Top off the brake fluid reservoir and leed the brakes as normal.

Bench bleeding an ATV master cylinder

The expression “bench bleeding” comes from removing the master cylinder off a car and bleed it on a workbench.

On an ATV, you don’t actually have to physically remove the master cylinder from the bike to “bench bleed” it, It is just as accessible where it is sitting on the bike.

It’s actually faster and easier to bleed it when still attached to the bike, but you run a small risk of spilling brake fluid on the ATV. Brake fluid is corrosive and will damage paint and plastic.

Another benefit of bleeding the reservoir on the bench is that you are free to rotate it so that the outlet port can be facing upwards when you are done bleeding.

This way, you can better prevent air from getting back into the system during installation. The banjo bolt can be installed with the port still facing upwards before fastening the master cylinder to the handlebar again.

Ultimately it is up to you whether you want to bleed the master cylinder when still attached to the handlebar or if you want to remove the whole assembly and perform the job over at your workbench.

Tools required:

The same tools as the first method. Also, you need the proper tools to remove the master cylinder from the handlebar. This varies between the brands and models of ATVs.

This is how you do it:

The procedure is pretty much identical with bleeding the master cylinder when still attached to the bike. But before you begin, you need to remove the whole assembly from the ATV.

  1. Pull back the rubber cap covering the banjo bolt.
  2. Place a rag underneath to soak any spilled brake fluid.
  3. Open the banjo bolt using the wrench.
  4. Then proceed to remove the master cylinder assembly from the bike and moving it to your workbench.
  5. Secure the unit in a vice, but do not overtighten. The material cracks easily.
  6. Bleed the master cylinder as described in steps 6 to 11 from the first method in this post.
  7. When you are done with step 11, top off the reservoir with new brake fluid and reinstall the cover.
  8. After reinstalling the cover, rotate the assembly so that the outlet port is facing upwards and move it over to the bike.
  9. Install the banjo bolt with the outlet port still facing upwards.
  10. Then reassemble the master cylinder to the handlebar.
  11. Finish off by bleeding the brakes as you normally would.

About ATV Master Cylinder
“atv master cylinder”
“atv master cylinder bleeding”
“atv master cylinder rebuild kit”
“atv master cylinder problems”
“atv master cylinder cost”
“how to bleed atv master cylinder”

What is an ATV?

At its simplest, an all-terrain vehicle (ATV) is defined as a vehicle with the following: a straddle seating position, handlebar steering, and the ability to maneuver through a variety of terrain conditions. While there are a variety of ATV customizations and modifications available, at their base all ATVs share those three features.

Wheels and Tires

ATVs have either three or four wheels. Tires are kept at a lower pressure than standard car or UTV tires.

Steering

The operator can steer the ATV by using handlebars.

Seating and passenger capacity

On an ATV, the operator is seated in a straddle position. ATVs are normally built for just one rider, some are made to carry the operator and one passenger.

Speed and handling

ATVs are not “one-size-fits-all” and should be sized appropriately for the operator.

When operated safely and correctly, ATVs offer a quick and nimble means of transportation over a variety of terrain.

Braking and acceleration

The majority of stock ATVs come with a thumb throttle. Pressing the throttle with the thumb controls acceleration. It is possible to modify an ATV to use a twist throttle, which allows the operator to control the vehicle’s acceleration by twisting the ATV’s handle.

Given the unpredictable nature of the terrain ATVs cover, twist throttles can make it difficult and dangerous to control the vehicle. For example, if a rider leans forward and unknowingly twists the throttle while going downhill, the vehicle may unexpectedly pick up speed. This can easily cause the rider to be thrown forward off of the vehicle, and the vehicle may roll and fall on the rider.

To brake, operators can use either the brake handle or the foot pedal, depending on what type of ATV they are operating.

Safety equipment

ATVs often do not come with safety equipment as part of the vehicle. Some do have “roll bars”—strong steel pipes that form a cage-like structure around the operator to provide protection if the vehicle rolls.

ATV operators should strongly consider wearing protective clothing, boots, and gloves—and should always wear a helmet.

Cabin

ATVs are open and do not have a cabin. However, as mentioned above, some do have roll bars.

Uses

As a quick means of transportation over rough ground, ATVs are a valuable tool. However, they are mainly used for recreation, like racing or trail riding.

Cost

Compared to UTVs, an ATV is a much more budget friendly option. When planning their purchase, potential buyers should make sure to account for the additional costs of safety gear and insurance.

About ATV
“about atv bike”
“about polaris atv”
“how to drive an atv 4 wheeler”
“how to use a 4 wheeler”
“4 wheeler atv”

What Is The Brake Shoe?

The brake shoe is a curved piece of metal used in drum brakes. Each brake shoe has friction material (known as brake lining) on one side.

The brake lining comprises of different types of heat resistant materials mixed with compounds like ceramic, brass, and graphite.

Brake shoes come in pairs and are usually bought in sets of four shoes — with two on each side.

You may notice one shoe in the pair has friction material that’s slightly shorter than the other. This is the primary shoe and faces the front of the vehicle. The secondary shoe, with more friction material, faces the rear.

Why is there a difference?

As the secondary shoe handles more braking than the primary shoe, it requires more friction material.

Now, let’s learn how brake shoes work.

How Brake Shoes Work In Drum Brakes

A drum brake system consists of a pan-shaped brake drum, a backing plate, brake studs, a hydraulic wheel cylinder and curved brake shoes. The friction material on the brake shoes faces outwards towards the inside of the brake drum.

Here’s what happens when you step on the brake pedal:

  • Force is converted into hydraulic pressure in the brake line from the master cylinder.
  • The hydraulic pressure through the brake line is transmitted by brake fluid, activating a piston in the wheel cylinder.
  • The piston pushes the brake shoes to contact the inside of the brake drum.
  • The brake shoes create friction with the brake drum, slowing the wheel.
  • When the brake pedal is released, stiff return springs retract the shoes to the original position.
  • A screw adjuster in the drum brake assembly extends gradually to compensate for worn brake shoes over time.

What about disc brakes?

The drum brake is a reliable braking system, though disc brakes (that use a caliper, brake pads, and rotor instead) have superseded it. You’ll still find a drum brake on the rear wheel of many cars because they’re cheaper to manufacture than disc brakes.

What about the parking brake?

The parking brake, or emergency brake, is operated from a lever via an emergency brake cable. When you pull the parking brake lever, it forces the brake shoes apart, the same way that hydraulics do.

In vehicles utilizing a drum brake system, the rear brake shoe pair performs the parking brake job. In cars with rear disc brakes, there’s usually a smaller drum brake in the brake rotor that performs a similar function.

About brake shoe
“brake shoe material”
“brake shoe bike”
“brake shoes”
“brake shoes and drums”

What ATVs Are Shaft Driven, and Why? Which Are Not?

When you’re in the market for a new ATV, there are many factors to consider, one of them being what drive system you should choose. You may have heard people talk about belt drive, shaft drive, and chain drive. You will learn that these terms are often used interchangeably, causing unnecessary confusion.

That’s why I decided to make this post to help clarify some of the terminologies and provide an overview of which shaft-driven ATVs are on the market.

Most utility and recreational ATVs on the market are shaft-drive; they use metal drive shafts to transfer power from the transmission to the wheels. This includes both ATVs with a belt-driven CVT transmission and beltless alternatives offered by Honda. The exception is most sport quads and some youth ATVs that are chain drive.

What do we mean by shaft-drive, belt drive, and chain drive in an ATV?

To understand why most ATVs are considered shaft driven, we need to clarify what we mean when we talk about an ATV being shaft drive, belt drive, or chain drive.

These three different terms are referring to what style of drivetrain a vehicle has. But the terms are not always used in the same way with all types of vehicles. Also, They do not always refer to the same specific component of the drivetrain.

The drivetrain includes every component that transfers the engine’s power out to the wheels, including the transmission. Different setups have different groups of components.

The driveline includes every component that transfers the power from the engine out to the wheels, except the transmission.

The ATVs in the market today come with one of two main styles of transmission systems:

  • CVT, continuously variable transmission. A CVT can be belt-driven, but this does not make the ATV belt drive. A CVT can also be chain driven (not so common on ATVs), but this does not make the ATV chain drive.
  • Geared transmission. A geared transmission is a gearbox is made from a group of metal gears and shafts, but this does not make the ATV shaft drive. Mechanical gearbox transmissions on ATVs are either manual, semi-automatic, or fully automatic.

Here is an overview over ATVs that have automatic transmissions.

Honda used to offer a hydrostatic transmission with their Hondamatic models, but none of their current models offer this transmission style. They do, however, use hydraulic torque converters.

What is shaft-drive on an ATV?

Shaft drive on an ATV usually refers to the driveline style and not the inner workings of the transmission. Regardless of what transmission type an ATV has, it may still be shaft-drive.

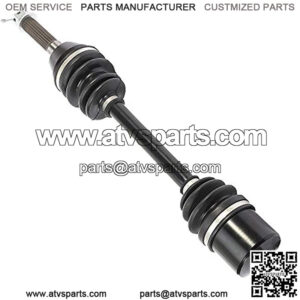
The shafts in a shaft drive refer to the metal driveshafts and axles that transfer power from the transmission to the wheels via the front and rear differentials.

The image at the top of the post show the rear drive shaft, while this image displays the fromt driveshaft on my Polaris Sportsman XP1000.

Some people refer to ATVs with beltless transmissions, typically the ones with a gearbox and clutch configuration, as being shaft-drive. They might be correct, but not because the ATV has a gearbox. It’s still the driveshafts and axles that would make the bike a shaft drive.

If a beltless ATV with a gearbox and clutch uses a chain to drive the wheels, it is chain drive, not shaft-drive.

While a gearbox is made from a group of metal gears and shafts, it is not considered a shaft drive. With gearbox transmissions on ATVs, it’s still the driveshafts and axles that make it a shaft drive.

So referring to beltless ATVs as a shaft drive may confuse since ATVs with CVT belt transmissions are shaft drives as well.

Let’s compare a few examples:

Can-Am Outlander has a CVT transmission and uses metal driveshafts and axles to transfer the power to the wheels. It is a shaft-drive ATV with a belt-drive transmission.

Honda Fourtrax Foreman ES has a five-speed + reverse automatic transmission and direct front and rear driveshafts. It’s a shaft-drive ATV with an automatic gearbox.

Yamaha Raptor 700 has a five-speed + reverse transmission with a chain final-drive. It’s a chain-drive ATV with a manual gearbox.

About atv drive shaft
“atv drive shaft removal”
“atv drive shaft boot”
“atv drive shaft replacement”
“atv drive shaft shop”
“atv drive shaft yoke”

HOW TO TIGHTEN A CHAIN ON AN ATV

Picture this: You’re cruising down the trail on your quad. You’re blasting the latest Swift jams and loving the freedom of the outdoors. Then, kablammo! Your ATV stops and your chain is laying on the ground. You really should’ve learned how to tighten the chain on your ATV before you blew it. At least you’ve still got Taylor.

That hasn’t happened to you yet (we hope), and we’re here to make sure it doesn’t. We’ll also give you a few extra pointers to make sure your ATV’s chain is off the chain and running smooth.

WHAT TO CONSIDER BEFORE TIGHTENING THE ATV’S CHAIN

First of all, are you even sure you need to tighten your ATV chain? Overtightening your chain can cause just as many problems as undertightening.

SYMPTOMS OF A LOOSE CHAIN

Let’s look at the symptoms of a loose chain:

  • Jerky feeling when you accelerate due to slack
  • Power loss and clicking noise from the chain skipping over sprocket teeth
  • Your chain falls off mid-ride

If you notice any of these things happening while you ride, you need to tighten your chain ASAP. In fact, you shouldn’t let your chain get this bad in the first place.

Instead, you should compare the slack in your chain to your manuals guidelines before it gets bad. Once you start noticing these issues, you’ve already subjected your drivetrain and sprockets to excessive wear and tear.

SYMPTOMS OF AN OVERTIGHT CHAIN

You might be experiencing some issues that you’re pretty sure are chain related, but it might be because your chain is too tight.

Having a too-tight chain can cause:

  • Excess wear on your sprockets and drivetrain
  • Less rear suspension travel
  • Power loss

So don’t just assume your chain problems are due to a loose chain. Improper maintenance and overtightening can cause similar drivetrain issues. Check your manual and measure your slack to see what your chain needs.

HOW TO TIGHTEN THE CHAIN

In order to tighten the chain on an ATV, you just need a few wrenches or sockets, a measuring tape, and, for some ATVs, a screwdriver.

Here is how to tighten the chain on your ATV.

1. MEASURE THE SLACK IN YOUR CHAIN

  • Check the factory recommended slack in your user manual (usually 1-1.5 inches)
  • Have somebody sit on the ATV to simulate the tension the chain normally sees
  • Place the end of your tape measure flat on the skid plate or chain guard near the center of the swing arm
  • Note the measurement where the chain rests naturally, then pull up on the chain and note it’s measure at it’s highest point
  • Take the difference of those measurements to get your chains slack

Now that you know how much slack is in your chain, you know if it’s actually too loose or if you’ve got some other issues going on.

2. TIGHTEN YOUR ATV CHAIN

  • Loosen, but don’t remove the bolts on the bearing carrier at the rear of your machine
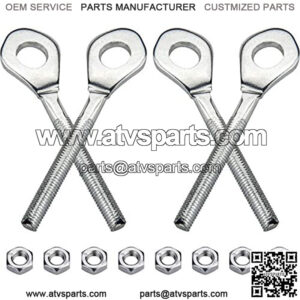
  • Find the adjuster bolt or bolts and loosen the jam nuts
  • Tighten the adjuster bolts to tighten the chain
  • With weight on the ATV, take measurements of your slack and make adjustments until it’s in the appropriate range
  • Tighten all of your hardware and jam nuts

If you don’t have adjuster bolts, the process is a little bit different:

  1. Loosen, but don’t remove the bolts on the bearing carrier at the rear of your machine
  2. Find the hole that allows you to slip a screwdriver or allen key through the carrier and sprocket
  3. Rotate the rear wheels forward to tighten—with the allen key in place, this will rotate the entire bearing carrier and move the centerline backwards
  4. With weight on the ATV, take measurements of your slack and make adjustments until it’s in the appropriate range
  5. Tighten all of your hardware

That’s it. Easy peasy. Your first time should only take you a few minutes as long as there’s not too much dirt or rust keeping your bolts tight. After doing it a few times, you’ll be a chain tightening master.

HOW TO CHANGE THE CHAIN

Sometimes tightening your ATV chain isn’t enough. Sometimes that chain is kaput and it’s time to say, “see ya!” and toss it in the trash. But how can you tell?

There are a couple telltale signs: rust and stretching.

Rust is the enemy of your chain. If your chain is rocking that dusty red patina, don’t bother cleaning it up. You need to replace it. It means your chain is weak, and it likely has some damage to it already. Sooner or later, your rusty chain is gonna break. Ditch it for a new one.

Stretching is natural and happens to every chain eventually. This can be difficult to check, though. You can check to make sure the links are resting nicely on the sprocket. If you have a new chain to compare it to, you can measure the new chain (as long as it has the same number of links) and compare to the old one. Too much stretching causes wear and so a stretched chain should be replaced.

STEP-BY-STEP GUIDE TO CHANGING AN ATV CHAIN

Changing an ATV chain is a piece of cake. The only complication is if you have a rivet-style master link on your chain. If you do, you’ll need a master link rivet tool. Be sure to follow the instructions included with the tool to remove your chain.

Clip-style master links are much more common on ATVs, and they make removing and replacing the chain simple.

Here’s how to remove a chain with a clip-style master link:

  1. Find the master link on your chain—it’s the link with the clip
  2. Use a flathead screwdriver to remove the clip
  3. Remove the face and O-rings (if you have them) followed by the back plate and pins
  4. Count the links in your current chain and add or remove links to your new chain to make them the same (don’t measure to compare—your old chain will be stretched somewhat)
  5. Fit the new chain over the sprockets and connect the master link
  6. Follow the steps above to tighten your chain to the appropriate slack

And that’s all it takes. There’s no reason to put it off, so get it done today.

Changing your chain won’t necessarily solve all your problems. One of the persistent issues some people have with ATV chains is that the dang things keep falling off. Don’t worry—if you can identify the cause, you’ll be able to solve this problem, too.

WHY AN ATV CHAIN MIGHT KEEP FALLING OFF

There are three reasons your ATV chain might be falling off:

1. IT’S TOO LOOSE

You’ve let it go too long without tightening it up again. Tighten it up right away to avoid other damage.

2. IT’S STRETCHED OUT

An old stretched out chain might get booted off the sprocket if it doesn’t fit quite right. No amount of tightening will fix this and it’s likely to brake soon. Replace it.

3. IT’S UNPROTECTED

Do you have a skid plate or chain guard? If not, sticks, rocks, and bumps can knock your chain off at any time! Not to mention, they can permanently damage your sprockets and other drivetrain components. Do not ride again without adding a skid plate or chain guard.

About ATV chain axle ajuster
“atv rear chain axle adjuster”
“how to tell if cv axle is bad on atv”
“how to rebuild atv cv axle”
“how to adjust clutch on atv”