AtvsParts

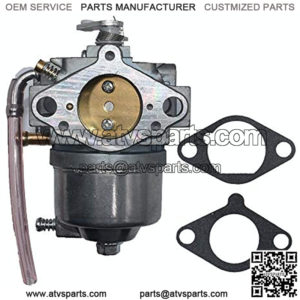
How an ATV Carburetor Works

What Is a Carburetor?

A carburetor is a mechanical device that mixes fuel and air to allow for internal combustion. Its function is inspired by Bernoulli’s principle, which states that as air moves faster, its static pressure reduces, consequently increasing its dynamic pressure.

An ATV carburetor has an open pipe in the form of a venturi, which allows for the passage of air into the engine’s inlet manifold. The inlet manifold, also called the intake manifold, is part of the engine that supplies the air/fuel mixture to the cylinders.

How Does an ATV Carburetor Work?

Carburetors usually vary in terms of design and complexity. However, most of these mechanical devices function on the same basic principle- mixing air and fuel to promote combustion and consequently power the engine.

The failing pressure of the speeded-up air creates a much-needed sucking effect for the release of fuel.

This comes in extra handy when the engine is cold, running quite slow, or when it’s just starting up.

Here’s a quick summary of how the ATV carburetor works:

  • Air flows from the ATV’s air intake and into the top of the carburetor.
  • The air then passes through a filter that cleans potential debris, ensuring only clean air gets inside the carburetor.
  • When the ATV engine is started, the choke can be adjusted such that it strategically blocks the top of the pipe, thus reducing the total amount of air flowing inside the carburetor. This consequently increases the fuel content in the mixture that enters the cylinders.
  • The dip in air pressure helps create suction on the fuel pipe, which draws in the fuel.
  • The throttle, located at the bottom of the venturi, regulates the mixture of air and gas to allow the engine to produce more power, making the ATV move faster.
  • The air and fuel mixture then flows into the engine’s cylinders.
  • The fuel is continuously supplied to the mixture through the float-feed chamber.
  • The choke opens whenever the fuel level falls.

About ATV carburetor
“atv carburetor replacement”
“atv carburetor parts”
“atv carburetor rebuild kit”
What are the uses of ATV accessories?

ATV (All-Terrain Vehicle) accessories are additional components and equipment that can be added to an ATV to enhance its functionality, appearance, comfort, and safety. These accessories are designed to cater to various needs and preferences of ATV owners. Here are some common uses of ATV accessories:

  1. Utility and Cargo Carriers: ATV accessories such as racks, baskets, and cargo boxes are used to increase the ATV’s carrying capacity. They allow users to transport tools, equipment, gear, and supplies for various tasks, including farming, hunting, camping, and trail maintenance.
  2. Winches: Winches are used to pull heavy objects or the ATV itself out of difficult situations, such as mud, snow, or deep water. They are valuable accessories for off-road recovery and rescue operations.
  3. Plows and Blades: Snow plows and blades can be attached to the front of an ATV for snow removal or light-duty grading and leveling of dirt roads, driveways, and paths.
  4. Trailers: ATV trailers are designed to be towed by ATVs, increasing their hauling capacity. They are used for transporting larger loads, firewood, debris, and even other ATVs.
  5. Gun and Bow Racks: Hunters use gun and bow racks to securely transport firearms and archery equipment on their ATVs while keeping them readily accessible.
  6. Lighting: ATV lighting accessories include LED light bars, spotlights, and auxiliary lights that enhance visibility when riding in low-light conditions or off-road environments.
  7. Sound Systems: Some ATV enthusiasts add sound systems to their vehicles, allowing them to enjoy music or audio entertainment while riding.
  8. GPS and Navigation: GPS units and navigation systems can be mounted on ATVs to help riders find their way in remote areas, explore trails, and mark waypoints for future reference.
  9. Protection and Safety: Accessories like brush guards, skid plates, and nerf bars protect the ATV from damage while off-roading and provide safety to riders in case of accidents or collisions.
  10. Comfort and Ergonomics: ATV accessories such as padded seat covers, handlebar grips, and heated grips enhance rider comfort during long rides in varying weather conditions.
  11. Hunting and Outdoor Accessories: Hunters often use ATV accessories like camouflage wraps, gun holsters, and game carriers to aid in hunting expeditions.
  12. Towing and Hitch Accessories: ATV hitches and towing accessories enable users to tow trailers, utility carts, and other equipment behind their ATVs.
  13. Security and Locking Systems: ATV security accessories include locks, chains, and covers to protect the ATV from theft and unauthorized use.
  14. Aesthetic Enhancement: Some ATV owners add accessories like custom graphics, decals, and body kits to personalize and enhance the appearance of their vehicles.
  15. Storage Solutions: ATV storage accessories include storage bags, boxes, and compartments to keep gear, tools, and personal items organized and protected during rides.


These are just a few examples of the wide range of ATV accessories available. The choice of accessories depends on the intended use of the ATV and the preferences of the owner. ATV accessories can significantly enhance the versatility and functionality of these vehicles, making them suitable for a variety of outdoor activities and tasks.

About ATV (All-Terrain Vehicle) accessories

all-terrain vehicle (atv)
all-terrain atv tires
all terrain accessories
dtb atv
off road all terrain vehicles
ev all terrain vehicles


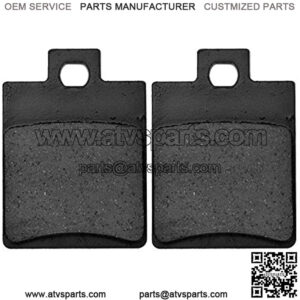
What Is The Brake Shoe?

The brake shoe is a curved piece of metal used in drum brakes. Each brake shoe has friction material (known as brake lining) on one side.

The brake lining comprises of different types of heat resistant materials mixed with compounds like ceramic, brass, and graphite.

Brake shoes come in pairs and are usually bought in sets of four shoes — with two on each side.

You may notice one shoe in the pair has friction material that’s slightly shorter than the other. This is the primary shoe and faces the front of the vehicle. The secondary shoe, with more friction material, faces the rear.

Why is there a difference?

As the secondary shoe handles more braking than the primary shoe, it requires more friction material.

Now, let’s learn how brake shoes work.

How Brake Shoes Work In Drum Brakes

A drum brake system consists of a pan-shaped brake drum, a backing plate, brake studs, a hydraulic wheel cylinder and curved brake shoes. The friction material on the brake shoes faces outwards towards the inside of the brake drum.

Here’s what happens when you step on the brake pedal:

  • Force is converted into hydraulic pressure in the brake line from the master cylinder.
  • The hydraulic pressure through the brake line is transmitted by brake fluid, activating a piston in the wheel cylinder.
  • The piston pushes the brake shoes to contact the inside of the brake drum.
  • The brake shoes create friction with the brake drum, slowing the wheel.
  • When the brake pedal is released, stiff return springs retract the shoes to the original position.
  • A screw adjuster in the drum brake assembly extends gradually to compensate for worn brake shoes over time.

What about disc brakes?

The drum brake is a reliable braking system, though disc brakes (that use a caliper, brake pads, and rotor instead) have superseded it. You’ll still find a drum brake on the rear wheel of many cars because they’re cheaper to manufacture than disc brakes.

What about the parking brake?

The parking brake, or emergency brake, is operated from a lever via an emergency brake cable. When you pull the parking brake lever, it forces the brake shoes apart, the same way that hydraulics do.

In vehicles utilizing a drum brake system, the rear brake shoe pair performs the parking brake job. In cars with rear disc brakes, there’s usually a smaller drum brake in the brake rotor that performs a similar function.

About brake shoe
“brake shoe material”
“brake shoe bike”
“brake shoes”
“brake shoes and drums”

What is an ATV handlebar grip

An ATV handlebar grip is a covering or sleeve that fits over the handlebars of an all-terrain vehicle (ATV). Its primary purpose is to provide a comfortable and secure grip for the rider. Handlebar grips come in various materials, designs, and sizes to cater to different preferences and riding styles. Here are some key points to know about ATV handlebar grips:

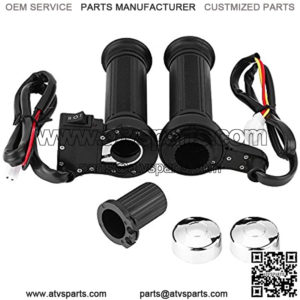
HEATED HANDLEBAR GRIPS, KEENSO UNIVERSAL 7/8 MOTORCYCLE ATV 22MM HAND WARMERS HANDLEBAR GRIPS HEATED/VOLTMETER/USB CHARGER FOR MOTORCYCLE/BIKE/ATV (10W - 15W)

  1. Materials: Handlebar grips can be made from various materials, each offering different benefits:
    • Rubber Grips: Rubber is a common material for ATV handlebar grips. It provides excellent grip and vibration absorption, reducing hand fatigue during long rides.
    • Foam Grips: Foam grips are lightweight and offer good shock absorption. They are comfortable for many riders and are often used in off-road and racing scenarios.
    • Gel Grips: Gel grips combine the advantages of rubber and foam grips, providing both comfort and vibration dampening.
  2. Design: Handlebar grips come in different designs and patterns, offering various textures and contours to enhance grip and prevent slippage, especially in wet or muddy conditions.
  3. Length: Grips are typically available in various lengths to fit different handlebar sizes. Some grips come in universal sizes, while others may be specific to certain ATV models.
  4. Installation: Most handlebar grips are designed to be easy to install. They typically slide onto the handlebars and are secured using adhesive or locking mechanisms. It’s essential to ensure the grips are properly aligned and secure to avoid any safety issues while riding.
  5. Comfort and Vibration Dampening: A good handlebar grip should provide a comfortable feel, reducing the impact of vibrations that can lead to hand fatigue during prolonged rides. Vibration dampening can be crucial, especially when riding on rough terrains.
  6. Customization: Some riders prefer to personalize their ATV by choosing grips with specific colors, patterns, or logos that match their style or the overall aesthetic of their vehicle.
  7. Replacement and Maintenance: Handlebar grips can wear out over time, especially if subjected to rough use or exposure to harsh weather conditions. Regularly inspecting and replacing worn-out grips will ensure a safe and enjoyable riding experience.

When choosing ATV handlebar grips, consider your personal comfort, riding preferences, and the terrain you’ll be traversing. High-quality grips can significantly improve your control and overall riding experience, making them a worthwhile investment for any ATV owner.

About ATV handlebar grip

atv handlebar grips wholesale
best atv handlebar grips
how to remove atv handlebar grips
7/8 atv handlebar grips
yamaha atv handlebar grips
installing atv handlebar grips

Tell you how to install atv axles

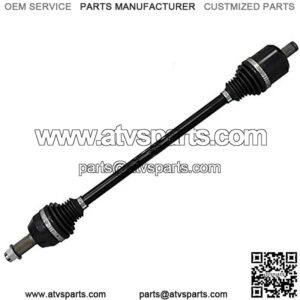
  1. Locate the Axle: Identify the location of the axle you need to replace. Most ATVs have two axles—one for the front wheels and one for the rear wheels.
  2. Remove the Wheel: Use a socket set or wrenches to remove the lug nuts or bolts that secure the wheel to the axle. Carefully remove the wheel and set it aside.
  3. Access the Axle: Depending on your ATV model, you may need to remove additional components, such as the brake caliper or suspension arms, to access the axle. Refer to your ATV’s service manual for specific instructions on how to do this.
  4. Disconnect the Old Axle: Once you have access to the axle, you’ll likely need to remove a retaining clip or cotter pin that secures the axle to the differential or wheel hub. Remove the retaining hardware and carefully slide the old axle out of its housing.
  5. Install the New Axle: Slide the new axle into the housing, making sure it aligns correctly with the differential or wheel hub. Reattach any retaining clips or cotter pins to secure the axle in place.
  6. Reassemble Components: If you had to remove any additional components to access the axle, reassemble them according to the manufacturer’s instructions.
  7. Reinstall the Wheel: Place the wheel back onto the axle and tighten the lug nuts or bolts securely.
  8. Repeat for the Other Axle (if applicable): If your ATV has two axles, repeat the above steps for the other axle.
  9. Lower the ATV (if raised): If you used a jack or lift to raise the ATV, carefully lower it to the ground.

how to install axles on a trailer
how to install atv wheel spacers

What is an ATV Throttle Control

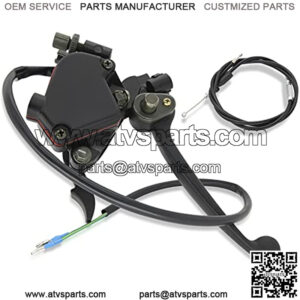
An ATV (All-Terrain Vehicle) Throttle Control refers to the mechanism or device used to regulate the engine’s throttle on an ATV. The throttle controls the amount of fuel and air mixture that flows into the engine, determining the engine’s power output and ultimately controlling the vehicle’s speed.

ATVs typically have a hand-operated throttle control located on the handlebars. When the rider twists the throttle grip, it opens the throttle valve in the engine’s carburetor or throttle body, allowing more fuel and air to enter the combustion chamber. This increased fuel and air mixture leads to higher engine RPM (Revolutions Per Minute) and more power, causing the ATV to accelerate.

The throttle control is a critical component of an ATV, as it provides the rider with the ability to control the vehicle’s speed and maneuverability. It allows the rider to smoothly accelerate or decelerate as needed while riding on various terrains.

Moreover, modern ATVs may be equipped with electronic throttle controls, also known as “throttle-by-wire” systems. In these setups, the throttle grip is connected to sensors that send signals to the ATV’s engine control unit (ECU). The ECU then adjusts the throttle electronically, providing more precise control over the engine’s performance and enabling additional features like traction control and electronic stability control.

It’s essential for ATV riders to understand how to operate the throttle control safely and responsibly to ensure a smooth and enjoyable riding experience while minimizing the risk of accidents.

The role of ATV throttle control is to regulate the amount of power the engine produces and, consequently, the vehicle’s speed and acceleration. It is a fundamental mechanism that allows the rider to control the ATV’s movement while navigating various terrains and riding conditions. The throttle control plays a crucial role in the overall operation and safety of the ATV. Here are some specific roles and functions of ATV throttle control:

  1. Speed Regulation: The primary purpose of the throttle control is to adjust the engine’s RPM and, consequently, the speed of the ATV. When the rider twists the throttle, it opens the throttle valve, allowing more fuel and air into the engine. This leads to increased engine power, higher RPM, and faster acceleration. Conversely, releasing the throttle reduces power, RPM, and speed.
  2. Maneuverability: Proper throttle control enables the rider to maneuver the ATV effectively. When navigating through tight spots, rough terrain, or obstacles, a delicate manipulation of the throttle allows the rider to maintain the appropriate speed and control over the vehicle.
  3. Smooth Acceleration and Deceleration: A well-functioning throttle control allows for smooth and gradual acceleration, which is crucial for maintaining control over the ATV and preventing jerky movements that may lead to instability or accidents. Similarly, controlled deceleration helps bring the vehicle to a stop smoothly.
  4. Climbing and Descending: When tackling inclines or steep descents, the rider can adjust the throttle to match the terrain’s demands. For uphill climbs, a bit more throttle may be required to maintain momentum, while controlled throttle reduction helps control speed on downhill sections.
  5. Traction Control: Some modern ATVs come equipped with advanced electronic throttle control systems that provide traction control features. These systems can adjust the throttle response to prevent wheel slippage on slippery or loose surfaces, improving overall traction and stability.
  6. Fuel Efficiency: By controlling the throttle, the rider can manage fuel consumption. Riding at a steady speed with controlled throttle inputs can help conserve fuel and extend the ATV’s range.
  7. Safety: Proper throttle control is essential for safe riding. Sudden and aggressive throttle inputs can lead to loss of control, wheel spin, or accidents. Consistent and careful throttle management enhances the rider’s ability to respond to changes in the terrain or unexpected obstacles.

Overall, the ATV throttle control is a critical component that empowers the rider to navigate various environments safely and efficiently. Understanding how to use the throttle properly, in combination with other riding techniques, contributes to an enjoyable and secure off-road riding experience.

About ATV (All-Terrain Vehicle) Throttle Control

atv all terrain vehicle
atc all terrain cycle
all-terrain vehicle (atv)
atv throttle assembly
throttle atv
best atv throttle extender

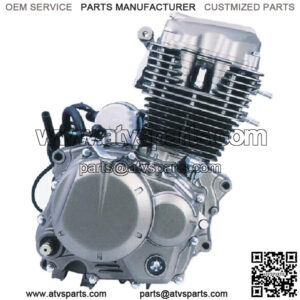
What is the engine of an ATV

The engine of an ATV, or All-Terrain Vehicle, can vary depending on the specific model and manufacturer. However, ATVs typically use one of the following types of engines:

  1. Four-Stroke Engine: This is the most common type of engine found in modern ATVs. It operates on a four-stroke cycle, which includes intake, compression, combustion, and exhaust. Four-stroke engines are known for their reliability, efficiency, and smooth power delivery.
  2. Two-Stroke Engine: While less common in modern ATVs, some older or smaller ATVs may use two-stroke engines. These engines operate on a two-stroke cycle, which combines the intake and compression strokes into one and the combustion and exhaust strokes into another. Two-stroke engines tend to be lighter and produce more power for their size but can be less fuel-efficient and emit more exhaust emissions.
  3. Electric Motor: With the advancement of electric vehicle technology, electric ATVs have also emerged. These ATVs are powered by an electric motor, which is typically powered by a rechargeable battery pack. Electric ATVs are known for their quiet operation, instant torque, and environmentally friendly nature as they produce zero exhaust emissions.

It’s worth noting that different ATV models may have variationAs in engine displacement, power output, and specific technologies employed, depending on the intended purpose of the vehicle, such as recreational riding, utility work, or racing.

An ATV (All-Terrain Vehicle) typically has an engine that serves several functions related to powering and propelling the vehicle. The specific design and features of an ATV’s engine can vary depending on the model and manufacturer. However, here are some common functions performed by an ATV engine:

  1. Power Generation: The primary function of an ATV engine is to generate power. The engine combusts fuel (usually gasoline or diesel) within its cylinders, creating controlled explosions that produce mechanical energy. This energy is then converted into rotational motion, which powers the ATV.
  2. Propulsion: The engine’s power is transmitted to the wheels through a transmission system, which allows the ATV to move forward or backward. The engine’s torque output is converted into rotational force that drives the wheels, enabling the ATV to traverse various terrains.
  3. Speed Control: The engine plays a crucial role in controlling the speed of the ATV. By adjusting the throttle, the rider can regulate the amount of fuel and air mixture supplied to the engine, thereby controlling the engine’s power output and ultimately the speed of the vehicle.
  4. Cooling: ATV engines generate a significant amount of heat during operation. To prevent overheating, engines are equipped with cooling systems that typically use a combination of air and liquid cooling. These systems help maintain the engine’s optimal operating temperature, ensuring efficient performance and preventing damage.
  5. Electrical Power Generation: In addition to powering the ATV’s propulsion, the engine also generates electricity to run various electrical components and systems. These may include lights, indicators, the ignition system, the fuel pump, and other accessories.

It’s important to note that the exact functioning and features of an ATV engine can vary depending on the specific model, engine size, and technology employed. Always refer to the manufacturer’s documentation for detailed information on a particular ATV’s engine.

atv engine oil
rotax engine atv
atv engine rebuild
atv engine siz
atv engine

Tell you how to install atv clutch weights centrifugal lever

  1. Remove the clutch cover: Use a socket or wrench to remove the bolts or screws that secure the clutch cover. Carefully remove the cover to expose the clutch assembly. Some ATVs may require a clutch puller tool to remove the clutch assembly from the engine shaft. Refer to your service manual for detailed instructions.
  2. Replace the clutch weights: The clutch weights are typically located within the clutch assembly. Remove the old weights by unscrewing or sliding them out, depending on the design. Install the new clutch weights in the appropriate locations within the clutch assembly. Refer to your service manual or the manufacturer’s instructions for the correct weight placement.
  3. Install the centrifugal lever (if applicable): Some ATVs may have a centrifugal lever that engages or disengages the clutch. If you’re replacing or adjusting the lever, carefully remove the old one and install the new lever in the designated position within the clutch assembly. Ensure it is properly aligned and secured according to the manufacturer’s instructions.
  4. Reassemble the clutch: Once the new weights and lever are installed, reassemble the clutch components in the reverse order of disassembly. Ensure the clutch components are aligned correctly and properly seated. Use a torque wrench to tighten the bolts or screws to the manufacturer’s specifications.
  5. Replace gaskets or seals (if required): Inspect the clutch cover and the mating surface on the engine for any gaskets or seals that may need replacement. If necessary, install new gaskets or apply sealant according to the manufacturer’s instructions to ensure a proper seal and prevent oil leaks.
  6. Reinstall the clutch cover: Place the clutch cover back over the clutch assembly and align it with the mounting holes. Carefully insert and tighten the bolts or screws to secure the cover.

atv clutch assenbly replacement
atv clutch removal tool